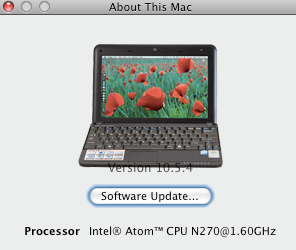
First I got a nice picture of the machine off the internet. Then I photoshop'ed in my actual screen. After that we have to make it into the correct format.
1. Make it the correct size which is 214 x 124. First I used 'Image size' and made the smaller dimenion so it would fit which turned out to be the height. So I made that 124, and then used 'Canvas Size' to expand the canvas to 214. In fact you may want to ensure a little transparency at the bottom else it'll overlap with the OS version information, so if I did this again I would use 214 x 120.

2. Make the image so it floats on a transparent layer

3. Then save as 'tiff' - don't worry about the color profile

4. The key bit is the Tiff options. Make sure you have 'save transparency' selected

6. Now save as 'MacOSX.tif' somewhere convenient, say your desktop.
7. We need to copy it to the correct place. Here the commands - may wrap
cd /system/library/coreservices/loginwindow.app/contents/resources
sudo mv MacOSX.tif MacOSX.tif.old
sudo cp ~/desktop/MacOSX.tif MacOSX.tif
This copies the current one so we can get it back if we want, and the copies the one we just made into the correct place.
Log out and back in, and the go to 'About this Mac'

No comments:
Post a Comment