Showing posts with label Apple. Show all posts

Thursday, 24 November 2011

Moving email from one Google Apps account to another

As part of my digital clean up, I needed to move email from an account on one domain, to an account on another domain.

Google Apps used to have a good tool for this, it ran from the cpanel over IMAP, and was in essence a server-server tool, but this got deprecated. Now, you need to download the email locally from the source account / domain, and then upload to the destination account / domain.

On a Mac there are two ways how to do this: use MailFetcher and the Google Email Uploader.

The Email Uploader is very nice. It links to your Apple Mail or Thunderbird on your local machine, shows folders, and you can selective which folder to upload. You can also give the transferred folder a name so you can see it.


To get the email onto your local machine you need to use these instructions. You would need the domain admin to turn on IMAP first of course.


You may find that nor all messages can be moved across. The uploader won't move corrupt messages, messages that are not RFC 822 compliant, or messages with disallowed attachments eg .exe.

If the message is not RFC 822 compliant then you'll see "Invalid RFC 822 Message" in the window.

    Message did not upload
       The operation couldn’t be completed. (Invalid RFC 822 Message: Date header "Sun, Dec 23 2001 13:26:12 +0000" is invalid.)
       /Users/user/Library/Mail/IMAP-user@domain.co.uk@imap.gmail.com/Email Saved.imapmbox/Messages/143660.emlx
      

I found that Mail did not see these messages either, so I couldn't use drag and drop, but since they are plain text you can view them using QuickLook in the finder, and decide if you really need them.


Also, if a folder / label has over 500 messages in it, you'll find progress quite slow after the 500. It gets to 500 really fast, maybe only a few minutes, depending on attachments. Thereafter you are limited to one message per second, so a folder with, say, 4000 message will take about an hour to upload. You might consider splitting a large folder up. You also likely parallelise things up, by running the uploader more than once, but I didn't try that. I know you can multiple GAMME uploads concurrently, to get around the ingestion limit.

Friday, 18 November 2011

Changing the email address of your Apple ID

As part of my clean up of my digital life, I decided to retire an email address, and my Apple ID was on that address so I needed to change it.

There's no doubt that changing the email address associated with things like your Apple ID can be scary. What if it goes wrong? Most folks have a lot of $$ / ££ / €€ invested in the iOS ecosystem.

BTW this doesn't solve the multiple Apple account problem. One day maybe Apple will solve this.

Here's the process (information gathered from Apple's help system, and personal experience).

  1. sign out of your iOS devices:

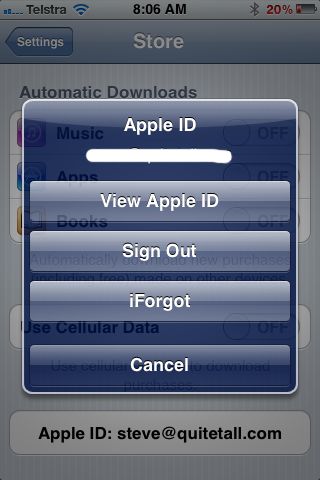
    settings > store


  2. sign out of itunes

    itunes > store > sign out


  3. goto appleid.apple.com and follow instructions from support.apple.com/kb/HE40

  4. login by selecting 'manage your account'. Use using existing (old) email address / password
     
  5. in the section for "Primary Email Address", click edit

    put in new email address, click save, and it'll generate a verification email
  6. If you try to run the verification too soon, you'll get an error saying something scary like the address is already in use.

    so, give it a few minutes, and re-login to iOS and iTunes, the try the verification again

Wednesday, 9 November 2011

OSX: Launching aplications as root

While looking for a solution to how to launch TrueCrypt as a root, when logged in as a plain user, I got the hang of a terminal command.

I thought I could also do it with an AppleScript. Turned out to be harder than I thought, but then I've never used ApleScript before.

First I got a copy of Pseudo, which was harder than I thought sice the author has disappeared. Eventually I found a copy here. NB these instructions WILL NOT work for Lion since Pseudo requires Rosetta, and Apple have done away with Rosetta.

  1. Launch Pseudo and create a new launch document


  2. Drag the TrueCrypt application icon onto that little window, and go to then Save
  3. Create an AppleScript:

    tell application "Pseudo"
        open file "Mac:Users:user:documents:TC_Root.pseudo"
    end tell

    Fix the command to reflect the location of the .pseudo document.

    Save this an an application, put on the dock, and when you run the script it'll launch TrueCrypt for you, with a pop up for credentials.

Monday, 7 November 2011

OSX QuickLook plugins

One moment my Mac can QL my camera raw files (NEF and CRW) and the next it cannot, just producing a grey area on the screen. Did a whole lot of googling to see whats going on. Didn't find anything other than suggestion to re-install the current update (10.6.8). A restart seemed a less time consuming option first, which happily fixed the problem.

While digging, I found that 3rd parties can write their own QL plugins, and there's even a site for them, www.quicklookplugins.com

Some plugins struck me as immediately useful such as:

whomwah.github.com/qlstephen to read the suffix-less README, INSTALL and CHANGELOG files you get with downloaded source code and some apps.


Here is it being used to QL the install instructions of itself. Your recursion dollars at work :-)

www.kainjow.com/?p=77 to QL AppleScripts

If you use InDesign, InCopy, ASE, PostScript, EPS, Illustrator & Quark then www.metadesignsolutions.com/products/mac-osx-quicklook-adoview.php will be useful, and the increase in productivity surely worth the $9.99

Photoshop brush viewer.


For more free ones take a look here.

When you've installed the QL plugin, you may need to force a refresh of the QL databse.

In terminal you can run some QL related commands:

    $ qlmanage -r

refreshes the QL databse

    $ qlmanage -p file.crw 

generates a preview. Handy to see if QL has the right plugin.

    $ qlmanage -h 

gives all its options

Usage: qlmanage [OPTIONS] path...
    -h        Display this help
    -r        Force reloading Generators list
    -r cache    Reset thumbnail disk cache
    -m [name ...]    Display statistics about quicklookd. Stats names:
            * plugins    Show the generators list
            * server    Show quicklookd life information
            * memory    Show quicklookd memory consumption
            * burst        Show statistics about the last burst
            * threads    Show concurrent accesses stats
            * other        Show other information about quicklookd
    -d debugLevel    Integer between 1-4
    -p        Compute previews of the documents
    -t        Compute thumbnails of the documents
    -x        Use quicklookd (remote computation)
    -i        Compute thumbnail in icon mode
    -s size        Size for the thumbnail
    -f factor    Scale factor for the thumbnail
    -z        Display generation performance info (don't display thumbnails)
    -o dir        Output result in dir (don't display thumbnails or previews)
    -c contentType    Force the content type used for the documents
    -g generator    Force the generator to use

or you can do

    $man qlmanage

NAME
     qlmanage -- Quick Look Server debug and management tool

SYNOPSIS
     qlmanage -r

     qlmanage -m [name ...]

     qlmanage -t [-d debugLevel] [-x] [-i] [-s size] [-f factor] [-c contentTypeUTI [-g generator]] [file ...]

     qlmanage -p [-d debugLevel] [-x] [-c contentTypeUTI [-g generator]] [file ...]

     qlmanage -h

DESCRIPTION
     qlmanage allows you to test your Quick Look generators and manage Quick Look Server.

     The following usages are available:

     1.       qlmanage -r resets Quick Look Server and all Quick Look client's generator cache.

     2.       qlmanage -m gets all sort of information on Quick Look server including the list of detected generators.

     3.       qlmanage -t displays the Quick Look generated thumbnails (if available) for the specified files.

     4.       qlmanage -p displays the Quick Look generated previews for the specified files.

     5.       qlmanage -h displays extensive help.

Monday, 24 October 2011

Updating iPod / iPad / iPhone open file open dialog, doesn't auto-update

If, when you click 'check for update' iTunes opens a dialog where you can select a new firmware, its due to iTunes auto check for update being turned off.

developer.apple.com/library/ios/#featuredarticles/FA_Deploying_iTunes/Introduction/Introduction.html refers

From the command line:

    defaults write com.apple.iTunes disableCheckForUpdates -bool NO

Manually updating iPod / iPad / iPhone firmware

If you have a few iOS devices to update, its best to download the update file (ie the .ipsw file), and manually apply.

www.felixbruns.de/iPod/firmware/ lists the various updates.

I use curl to download because if your lose the connection, curl will resume. Do a right / ctrl click on the link, copy and then in terminal make a command such as

    curl -o iPod_1.2_36B10147.ipsw http://appldnld.apple.com/iPod/SBML/osx/bundles/041-1920.20111004.CpeEw/iPod_1.2_36B10147.ipsw

Then in iTunes, option/alt click update and you can choose the firmware to apply.

Friday, 14 October 2011

OSX Command line image editing

If you are away from home, or just need some very light weight image processing here's two that are useful:

increasing jpeg compression because your connectivity is not so good, use 'sips'. Its built into OSX

    sips --setProperty formatOptions normal 1.jpg

or, for all images in a folder

    sips --setProperty formatOptions normal *

    sips --setProperty formatOptions normal *

SIPS can also take a % for finer control


    sips --setProperty formatOptions 30 *

If you want to use lossles rotation, the get nconvert from http://www.xnview.com/en/features_nc.html

Assuming you leave it in your downloads folder then the command to rotate 90 degrees anti-clockwise would be

    ~/Downloads/NConvert/nconvert -overwrite -jpegtrans rot90 1.jpg


After these, you'll find the date/time stamp of your files is wrong, so use jhead to put them back. First get it from http://www.sentex.net/~mwandel/jhead/

then the command would be

    ~/Downloads/jhead/jhead -ft *.jpg
    ~/Downloads/jhead/jhead -ft *.JPG

you'll note that its case sensitive.

Monday, 10 October 2011

The iPod cannot be updated because it contains files that are in use by another application.

If you get this error its most likely due to you syncing at the same time. So let the sync complete and try again.

Monday, 26 September 2011

Ubuntu Guest on OSX: getting 1280 x 800 and other resolutions

After install, pretty much everything works out of the box, except one annoyance. The screen resolution was stuck at 1024 x 768, which on a MacBookPro is annoying when you've got 1280 x 800 to play with.

Selecting System > Preferences > Monitor gives only 1024 x 768, 800 x 600, 640 x 480.


You need to install two things. First open a terminal window (Applications > Accessories > Terminal) and run the command

sudo apt-get install dkms

Put in your password, and it installs.

After its finished, install the Additions:

Right at the top, on the VirtualBox menu bar, select Devices / Install Guest Additions. You get the AutoRun prompt, so accept, then after click Run, and put in your password when asked.


Follow this through, it may take a few minutes and then restart. The 'power button' upper right.

After restart, initially things will look worse! You'll get 800 x 600. Don't worry. Go into full screen mode by pressing Apple-F.

The window will resize automatically to fill your screen ie 1280 x 800. You can then back into monitor settings and the new resolution will be there. When you press Apple-F again you'll run windowed mode, which is actually my favourite.


Friday, 23 September 2011

Howto Install Ubuntu Guest on OSX Host

If you are running an Apple Mac and you want / need to install Ubuntu as a Guest operating system.

I've used Parallels and VMWare and I find VirtualBox to be quite good, and free.

  1. Get VirtualBox from www.virtualbox.org/wiki/Downloads and install. Current version is 4.1.2

  2. Download the Ubuntu ISO from www.ubuntu.com/start-download?distro=desktop&bits=32&release=latest

  3. Create a new virtual machine. You can just follow the wizard. When its done you need to edit some settings.
    Link
  4. On the 'system' tab, deselect 'floppy', then select the CDROM and then the down arrow to move it down

  5. Click on Storage

    and the 'empty' under IDE controller. Click the disc symbol on the right and then "choose a virtual CD/DVD disk file" and that allows you to load the Ubuntu ISO file you just downloaded.


  6. I usually click on Audio and deselect it.


  7. Then click on Network , Advanced and change the emulated network adapter to PC-net. I fin the Intel Pro/1000 doesn't always work.

  8. Click OK, and then Start. Now we're running!

  9. Ubuntu starts and soon we can choose what to do. The defaults are OK, just remember to select the correct keyboard.


    I do like the way Ubuntu allows you to do some configuration while its installing. After a few minutes you can restart.

  10. Pretty much everything works out of the box, except one annoyance. The screen resolution was stuck at 1024 x 768, which on a MacBookPro is annoying when you've got 1280 x 800 to play with.

    Selecting System > Preferences > Monitor gives only 1024 x 768, 800 x 600, 640 x 480.


  11. You need to install two things. First open a terminal window (Applications > Accessories > Terminal) and run the command

    sudo apt-get install dkms

    Put in your password, and it installs.

    After its finished, install the Additions:

    Right at the top, on the VirtualBox menu bar, select Devices / Install Guest Additions. You get the AutoRun prompt, so accept, then after click Run, and put in your password when asked.


    Follow this through, it may take a few minutes and then restart. The 'power button' upper right.

  12. After restart, initially things will look worse! You'll get 800 x 600. Don't worry. Go into full screen mode by pressing Apple-F.

    The window will resize automatically to fill your screen ie 1280 x 800. You can then back into monitor settings and the new resolution will be there. When you press Apple-F again you'll run windowed mode, which is actually my favourite.


Monday, 15 August 2011

Macs with AES-NI

Macs with AES-NI - green = yes, red = no. If your Mac is not on the list, then likely its no, as at 15 August 2011. Basically to have any chance you need Core i5 or i7.


With OSX 10.7 Lion having Full Desk Encryption (FileVault 2), and it being able to have hardware
acceleration from CPUs that have AES-NI, you need to ask which CPUs in Apple Macs have AES-NI. Also useful if you use TruCrypt, which can use AES-NI. You can use TruCrypt to share encrypted drives / partitions between Macs and Windows - very useful if you use your office for off-site backup of home data.


Information compiled from www.everymac.com and ark.intel.com

Friday, 12 August 2011

How fast is openssl with AES-NI?

Now that Apple have moved to core i CPUs across their line from just a few before,

and with the release of Lion with its AES based full disk encryption called File Vault 2 (FV2), I've been curious about performance hit from FV2.


As far as I can tell, using FV2 gives a file system performance hit of less than about 10%. So if you were to move to SSD from spinners and then use FDE / FV2 on Lion then you would still see a big gain in disk I/O.


Anyway, you can run some openssl benchmarks.


On my personal MBP a 2.53 core 2 duo


    $openssl speed aes-256-cbc


    Doing aes-256 cbc for 3s on 16 size blocks: 18280734 aes-256 cbc's in 2.96s

    Doing aes-256 cbc for 3s on 64 size blocks: 4660089 aes-256 cbc's in 2.94s

    Doing aes-256 cbc for 3s on 256 size blocks: 1196116 aes-256 cbc's in 2.98s

    Doing aes-256 cbc for 3s on 1024 size blocks: 298821 aes-256 cbc's in 2.97s

    Doing aes-256 cbc for 3s on 8192 size blocks: 36577 aes-256 cbc's in 2.92s

    OpenSSL 0.9.8r 8 Feb 2011

    built on: Apr 22 2011

    options:bn(64,64) md2(int) rc4(ptr,char) des(idx,cisc,16,int) aes(partial) blowfish(ptr2)

    compiler: -arch x86_64 -fmessage-length=0 -pipe -Wno-trigraphs -fpascal-strings -fasm-blocks -O3 -D_REENTRANT -DDSO_DLFCN -DHAVE_DLFCN_H -DL_ENDIAN -DMD32_REG_T=int -DOPENSSL_NO_IDEA -DOPENSSL_PIC -DOPENSSL_THREADS -DZLIB -mmacosx-version-min=10.6

    available timing options: TIMEB USE_TOD HZ=100 [sysconf value]

    timing function used: getrusage

    The 'numbers' are in 1000s of bytes per second processed.

    type 16 bytes 64 bytes 256 bytes 1024 bytes 8192 bytes

    aes-256 cbc 98934.37k 101410.31k 102676.20k 102983.81k 102790.17k


If you have AES-NI and your openssl has AES-NI ability you can run


    $openssl speed –engine aesni –evp aes-256-cbc


If I find myself in an Apple store I might try running this.

Friday, 1 July 2011

How to use HFS Compression for on the fly space saving

OSX Leopard 10.5 and Snow Leopard 10.6 bring a new element to Apple's venerable filing system, HFS.

They introduced a near seamless and transparent feature called HFS Compression where file are transparently compressed on disk, and then de-compressed into RAM as they are loaded.

Basically in the days of super fast CPUs and huge RAM its a tradeoff between disk I/O and other system constraints.

You could also say that it helps Apple offer laptops with smaller SSDs than their platter equivalents because regular files take up typically only about 50% of the space.

OSX manages the compression for system files and applications and speeds loading times because the disk I/O CPU tradeoff is favourable.

What about other files? Well you can play too. There are three options:

  1. Clusters which is a nice GUI built on Apple's compression technologies. It offers background compression, pausing and other nice features.

  2. Ditto, the file command line management utility can create HFS Compressed files

  3. afsctool also allows you to manage file compression, and to report on the results.

Here are some afstool tips:

printout afsctool options and switches

$ afsctool > afsctool.txt

compress a directory:

afsctool -c ~/directory

compress a file:

afsctool -c ~/directory/file.txt

report which files are not compressed:

afsctool -c -l ~/directory

confirm the results of compressing:

afsctool -v ~/directory

the command I use with some useful extra switches:

afsctool -c -m 5242880 -s 5 ~/directory

the "-m" sets the size of the largest file to be compressed. Since the uncompressed file must be held in RAM, there is a tradeoff here. Its the size in bytes, so 5242880 bytes = 5MB. 10485760 = 10MB.

The -s" sets the minimum percentage that must be saved by compressing. The stops you compressing files for which there is no benefit eg media files, jpegs, zips and rars.

Here's the result of compressing a directory of old files:

/Users/directory:
Number of HFS+ compressed files: 87
Total number of files: 98
Total number of folders: 10
Total number of items (number of files + number of folders): 108
Folder size (uncompressed; reported size by Mac OS 10.6+ Finder): 34519979 bytes / 34.8 MB (megabytes) / 33.2 MiB (mebibytes)
Folder size (compressed - decmpfs xattr; reported size by Mac OS 10.0-10.5 Finder): 27890264 bytes / 28.1 MB (megabytes) / 26.8 MiB (mebibytes)
Folder size (compressed): 27902203 bytes / 28.1 MB (megabytes) / 26.8 MiB (mebibytes)
Compression savings: 19.2%
Approximate total folder size (files + file overhead + folder overhead): 28242154 bytes / 28.2 MB (megabytes) / 26.9 MiB (mebibytes)

So I'm saving overall about 20% of the space required which isn't bad for a directory that contains a lot of images and PDFs.

Handily, HFS Compression being very low level plays nicely with pretty much everything else except anything to do with developer tools - for some reason it really doesn't like compressing .c source code files.

So you can combine this with Dropbox to save some local space for all those important files that you don't need very often.

Sunday, 5 June 2011

OSX: suddenly cannot get onto the network / internet

I had a problem where without warning I couldn't get onto the network, internet WiFi, anything. DHCP just wasn't getting an address.

Using my phone to search Google, it seemed the answer was to download the combo updater and run it. Well yeah like I'm going to download a 1Gb file on my phone.

Anyway, turns out that there's a much simpler way: clear your caches

In the finder do shift-apple-g and then type

/Library/Caches

and OK.


When this folder opens, delete EVERYTHING! You might need to supply your password.

Then, same again:

In the finder do shift-apple-g and then type

~/Library/Caches - spot the "~" ?

and OK.


Again, delete EVERYTHING!

and reboot.

Explanation:

If the Macs battery goes completely, the clock gets reset. Even after you reset the clock, the certificates and the firewall get out of sync and suddenly all your applications, including DHCP no longer have network access.

Re-applying the combo updater also resets the firewall, which is why that works.

Saturday, 28 May 2011

Quicktime crash on OSX

Curiously, after years of working OK, QT 7 Pro on my MacBook Pro running 10.6.7 would not start anymore, doing ay immediate crash. I got a window and in that window the following text:

PlugIn Path: /Library/QuickTime/3DxQuickTime.component/Contents/MacOS/3DxQuickTime
PlugIn Identifier: com.3dconnexion.3DxQuickTime
PlugIn Version: 1.0.3 (1.0.3)

The answer is that you need to remove the following plugin:

/Library/QuickTime/3DxQuickTime.component/Contents/MacOS/3DxQuickTime

drag to your Desktop and you should be good to go

Sunday, 8 May 2011

Howto: Transfer Photos from Android to OSX using Bluetooth

If you use the Gallery app on your Android, you have some handy sharing features such as sending pictures over Bluetooth.

Well, I was trying to push some photos from my Nexus S to my Macbook Pro, and even though they were paired, it was failing. After a few minutes I would get the warning

"Bluetooth audio failed. There was an error connecting to your headset. Make sure it is turned on and in range. The audio portion of the program you were using may have to be restarted"


which was a surprise since I don't have a bluetooth headset.

I tried to re-pair the Nexus and OSX, but no change. After some tests I thought maybe I needed to change bluetooth sharing


and now it works great.

Here's a photo to send


press on the screen to get the menus


press menu


and share


and Send via Bluetooth


choose where its going, and on your Mac accept


then on your Android it copies over


job done!


Sunday, 1 May 2011

AES-NI in Macbook Pro laptops

If you have a Macbook Pro with a Core i5 or i7 you _may_ have AES-NI, which make AES encryption much faster.


Read about it here en.wikipedia.org/wiki/AES_instruction_set and check for CPU availability here ark.intel.com/MySearch.aspx?AESTech=true.


Not all Core CPUs have AES-NI. Here's Anandtech's page that summarises for 15" MBPs.


Apple 15-inch 2011 MacBook Pro CPU Comparison


2.0GHz quad-core 2.2GHz quad-core 2.3GHz quad-core
Intel Model Core i7-2635QM Intel Core i7-2720QM Intel Core i7-2820QM
Base Clock Speed 2.0GHz 2.2GHz 2.3GHz
Max SC Turbo 2.9GHz 3.3GHz 3.4GHz
Max DC Turbo 2.8GHz 3.2GHz 3.3GHz
Max QC Turbo 2.6GHz 3.0GHz 3.1GHz
L3 Cache 6MB 6MB 8MB
AES-NI No Yes Yes
VT-x Yes Yes Yes
VT-d No Yes Yes
TDP 45W 45W 45W


Thursday, 28 April 2011

Howto Compile dcraw on OSX

dcraw is cool and all, but the maintainer of the OSX binary isn't very timely. Currently only v 8.99 is available, which is well over 15 months old, while the windows version is at 9.07. No matter, we can compile ourselves!
  1. get dcraw.c
  2. put it somewhere eg ~/downloads
  3. open terminal and CD to ~/downloads
  4. run

    gcc -o dcraw -O4 dcraw.c -lm -DNO_JPEG -DNO_LCMS

  5. ignore the errors

    dcraw.c: In function ‘convert_to_rgb’:
    dcraw.c:8326: warning: passing argument 1 of ‘pseudoinverse’ from incompatible pointer type


  6. produces a file 'dcraw' in the downloads folder
  7. switch to finder and do command-shift-g
  8. type /bin
  9. move dcraw from downloads to /bin
Ready to run!

Friday, 22 April 2011

MacBook Air Super Drive hack: other Macs can play.

MacBook Air Super Drive hack: other Macs can play!

Doh silly me for thinking it was only _intended_ for MacBook Airs, not _just_ for MBAs! And that it would work on regular computers. After trying it on 2 Macbook Pros, I even removed the drive and tried it in a MacBook Pro thats has PATA optical drive connection. Worked great. So I figured the bridge was not working, even though it shows as a device in System Profiler.


Huh. Well it seems Apple have fixed the firmware of the (PATA) IDE to USB bridge so it only works with Mac Airs.

tnkgrl in a post tells how various methods to overcome this didn't work, such as checking supplied voltage and kexts, and how a hardware hack was required.

If its of interest you can get the required IDE/USB bridge from www.centrix-intl.com/details.asp?productid=3022

Thursday, 3 March 2011

Resolving Orphaned Calendars on iPhone

Had a problem orphaned calendars on my iPhone which kept buzzing at weird hours, but I wasn't syncing anything from iTunes. So I created a new calendar in iCal, and then sync'd just it from iTunes. This got ride of the orphaned calendar.

But it seems iPhone doesn't like not having a calendar. If you try to have no calendars on your iPhone, it will create a new empty one called 'Calendar'.
which will get sync'd over to your Mac after syncing your iPhone.