If you have a machine on the internet that you can connect to via SSH, then you should consider disabling password access and use only key / passphrase.
First you need to create a key on the client machine
$ ssh-keygen -t dsa -f ~/.ssh/id_dsa username@domain.com
(Enter passphrase)
The username@domain.com can be of the form fred@google.com, or just fred. For example, to get to my machine at home from the Internet I login as
$ ssh name@server.domain.com
so thats what I put in for the key. However, when I am at home, I don't need FQDN or a different account name, so
$ ssh server
will do. Either is good.
next you need to copy the key to the remote server$ scp ~/.ssh/id_dsa.pub remoteserver:
user@server's password:
Then you need to login to the remote server:
$ ssh user@remoteserver:
user@server's password:
then you need to copy the key into the authorized keys file:
$ cat id_dsa_something.pub >> .ssh/authorized_keys2
$ chmod 600 .ssh/authorized_keys2
if you get an error about "authorized_keys2" not being available, its likely because the account on remote machine has never SSH'd to anywhere else. So SSH to somewhere and try again.
now, when you do
$ ssh remoteserver
you should get the SSH-AGENT dialog box

When this is working, you can then turn off password authentication. On the remote machine opne the sshd_config file
$ nano /private/etc/sshd_config
and locate the lines below, removing the #
PasswordAuthentication no
ChallengeResponseAuthentication no
restart SSH and you are good to go
on the client you can manage your SSH identities for example:
to list the identities
$ ssh-add -l
to delete all identities, which you might want to do if you are doing a key re-fresh
$ ssh-add -D
All identities removed.
more at the man page developer.apple.com/documentation/Darwin/Reference/ManPages/man1/ssh-add.1.html
After a restart of the server, no users could log in. They got authenticated, but then after a loooong delay their Finder said 'disconnected'.
Checking the AFP log on the server I see lots and lots of
IP 192.168.1.21 - - [21/Jun/2009:18:50:00 0000] "Login bob" 0 0 0
**** - - [21/Jun/2009:18:50:02 0000] "Mounted Volume XServer" 0 0 0
**** - - [21/Jun/2009:18:50:02 0000] "Mounted Volume Data" 1 0 0
**** - - [21/Jun/2009:18:50:02 0000] "Mounted Volume Disk1" 2 0 0
**** - - [21/Jun/2009:18:50:02 0000] "DiskArbStart -" 0 6403 0
IP 192.168.1.21 - - [21/Jun/2009:18:50:11 0000] "Login bob" 0 0 0
IP 192.168.1.21 - - [21/Jun/2009:18:50:11 0000] "Login bob" 0 0 0
IP 192.168.1.21 - - [21/Jun/2009:18:50:11 0000] "No matching key: bob" 1247645341 1243892782 92
**** - - [21/Jun/2009:18:50:12 0000] "Mounted Volume XServer" 0 0 0
**** - - [21/Jun/2009:18:50:12 0000] "Mounted Volume Disk2" 1 0 0
**** - - [21/Jun/2009:18:50:12 0000] "Mounted Volume Disk1" 2 0 0
**** - - [21/Jun/2009:18:50:12 0000] "DiskArbStart -" 0 6403 0
IP 192.168.1.21 - - [21/Jun/2009:18:50:21 0000] "Login bob" 0 0 0
IP 192.168.1.21 - - [21/Jun/2009:18:50:21 0000] "Login bob" 0 0 0
IP 192.168.1.21 - - [21/Jun/2009:18:50:21 0000] "No matching key: bob" 1247645341 1243892782 92
A restart didn't fix it, so decided to re-install the latest patch from the combo, in this case 10.4.11. Now everything is back to normal.
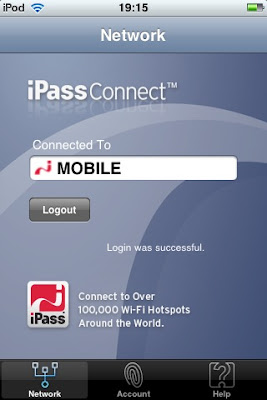
Now that I have an iPass account, and I got it working on my MacBook, next challenge was getting it going on the iPod, then I can listen to music and catch up on the news.
The basic process is the same as for using iPass on OSX, except that for the iPod client there's no domain field. So this time the fields look likeUserName: domain.com/username
Password: what the IT guys gave you
Some times you get your credentials in the form of an email address and password so this forms the basis of what you do.
After you've put in your credentials in iPass, save them.
.jpg) Then go to the wireless control preference and connect to the hotspot
Then go to the wireless control preference and connect to the hotspot
Go back to iPass, press 'Login' and after a few seconds you should be good to go. You'll know you're in if it says 'synchronising data'.
Well finally I've got connecting to hotspots using iPass on OSX working. We have a corporate account with iPass, and I installed the software. After much much trial and error, I got some settings that work. Hurray! Now I can use the Internet while mobile and it doesn't cost as much as 3G, especially abroad.
Whe you install the sofware put in your credentials as shown, or, if you get it wrong or need to check something, you can see them from System Preferences.
UserName: domain.com/username
Password: what the ITs guys gave you
Domain: domain.com

Some times you get your credentials in the form of an email address and password eg
so use those bits as your credentials. Sample screenshot above.
Now, click on the fan symbol on the menu bar, and select a hotspot. In the example below I use MOBILE which is Swisscom.
 What should happen is that the iPass client should kick on and log you on. Sometimes this doesn't happen, so if it doesn't, go back to the airport fan, turn airport off, count to ten, and turn back on again.
UPDATE: Sometimes iPass doesn't connect at all and just seems to go to sleep. If this happens, you may need to quit the iPass application, and relaunch it. It doesn't have a 'quit' button, so what you can do is use Activity Monitor, click on iPass and press 'Quit Process'.

Then go to System Preferences, click on iPassConnect and it should re-launch.
All (color) devices have a color space and profile. It is self evident that an RGB device like a monitor will shows color differently to a CMYK device like a printer. The problem is how to ensure that the color is controlled whichever device you show your image on. The solution is to use color profiles, or ICC profiles.
These make allowances for both how many colors the device can display, or colorspace, and what those colors look like ie the diplay profile.
When you take a photo the sensor has a profile which will be stored inside the image, typically sRGB. Most devices can show sRGB OK, and then you need ColorSync to manage the interchange for you.
OSX has applications that are ColorSync aware, and those that are not. In my experience QuickLook (OSX Finder Preview) is not, while Preview is. What this means is that if you show your images on a non sRGB device then colors will look different between the two applications.
OSX offers the ColorSync utility to manage Assign, Apply, Match ICC profiles
Choose what to do with the profile from the first pop-up menu at the bottom of the window.
To choose the ColorSync profile used for an image, choose Assign profile.
ColorSync Utility does not modify the image saved in the file; it changes only the ColorSync profile for the image.
To modify your image so it is matched to a specific ColorSync profile, choose “Match to Profile.”
ColorSync Utility modifies the pixels in the image to match the new color model and ColorSync profile, and then assigns the new ColorSync profile to it.
To modify your image so it is matched to a specific ColorSync profile and then apply the image’s original ColorSync profile to the image, choose Apply Profile.
ColorSync Utility modifies the pixels in the image to match the new color model and ColorSync profile, and then assigns the image’s original ColorSync profile to it.
Choose the profile from the second pop-up menu at the bottom of the window.
Choose the intent of the color profile from the third pop-up menu at the bottom of the window.
■
If you want to use the default intent, choose Automatic.
■
If you want realistic-looking colors, as in photographs, choose Perceptual.
■
If you want to maintain color accuracy, as in logos, choose Relative Colorimetric.
■
If you want to maintain the vividness of colors, as in pie graphs and bar graphs, choose Saturation.
■
If you’re using color spaces with different white points and want to adjust the colors to account for the difference, use Absolute.
Howto enable root on Android including Cupcake.
You need a tool called ADB - Android Debug Bridge
- get the SDK from Google from here
- expand the zip and copy it someone handy. I chose /Applications/Android/SDK/sdk_1.5r1
- turn on USB Debugging - go to settings>applications>development
Connect your Android by USB to your Mac and type the following:
/applications/android/sdk_1.5r1/tools/adb shell
gets you a command prompt '#'
# mount -o remount,rw -t yaffs2 /dev/block/mtdblock3 /system
# cd /system/bin
# cat sh > su
# chmod 4755 su
# exit
and unplug the USB.


.jpg)


